
Easy Homemade Sandwich Bread
FOOD & KITCHEN · WE TRIED / WE LEARNED
No bread flour. No sourdough starter. No complicated techniques. Just one soft, golden homemade sandwich loaf made with ingredients you probably already have.
Sometimes the best recipes come from a change of plans.
Our sourdough starter wasn’t quite ready, but we were already looking forward to homemade bread. Rather than wait another day, we made this homemade sandwich bread with a single packet of active dry yeast.
With all-purpose flour, 2% milk, honey, an egg, and a little butter–olive oil spread, we made a beautifully risen sandwich loaf with a golden crust and a wonderfully soft center.
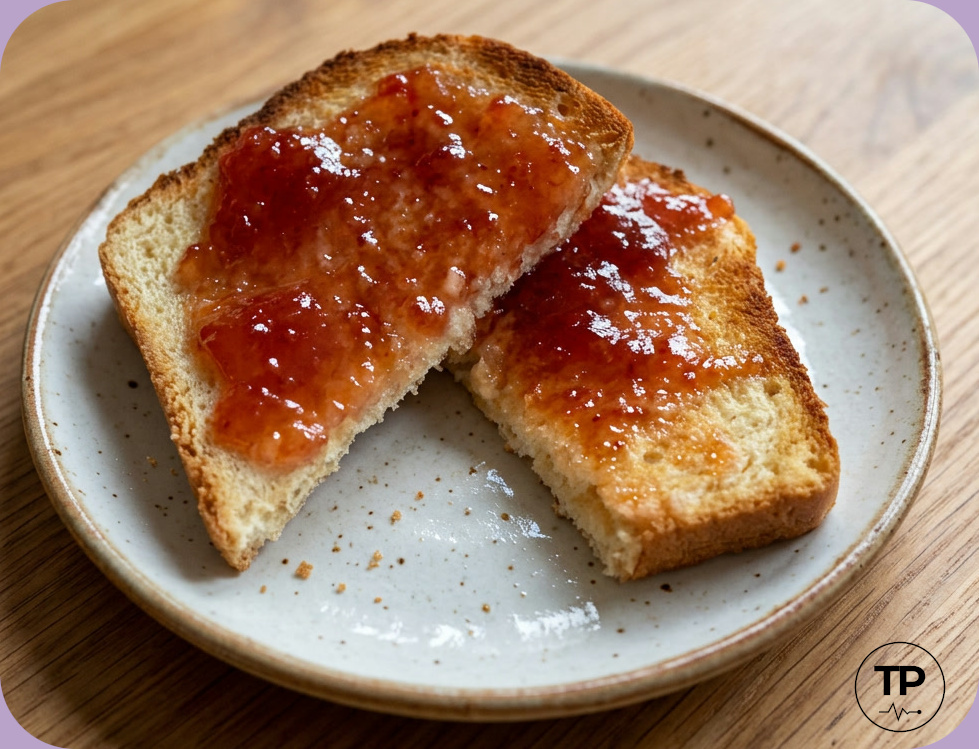
The result? A tender, everyday bread that’s equally good for sandwiches, buttered toast, or a little jam.
And that’s how this soft homemade sandwich bread recipe earned a permanent place in our kitchen.
READY TO BAKE?
Head straight to the recipe, print a copy, or follow along with our beginner-friendly baking guide.
THE GOOD STUFF
Why This Easy Homemade Bread Is Worth Making
There’s something wonderful about pulling a loaf of bread from your own oven. It smells incredible, tastes fresh, and somehow makes even an ordinary sandwich feel special.
But what makes this recipe especially useful is how uncomplicated it is.
- No bread flour needed: Regular all-purpose flour works beautifully.
- One packet of yeast: No starter to feed or maintain.
- Soft, tender texture: Milk, honey, egg, and fat help produce a lovely sandwich loaf.
- Beginner-friendly: You don’t need special bread-making skills.
- Everyday versatility: Sandwiches, grilled cheese, French toast, or simply butter and jam.
Best of all, most of the time is hands-off. Once the dough is mixed and kneaded, the yeast takes over much of the work.
RECIPE AT A GLANCE
One Packet. One Beautiful Loaf.
- Yield: 1 sandwich loaf
- Pan: 9 × 5 inches
- Prep and kneading: 20–25 minutes
- First rise: 60–90 minutes
- Second rise: 45–75 minutes
- Oven: 350°F
- Baking: 32–38 minutes
- Cooling: 90 minutes–2 hours
Rising times depend on your kitchen temperature. Plan on roughly 4–6 hours from beginning to slicing, including cooling, with much of that time spent waiting.
Before You Start: A Little Bread-Baking Confidence
If you’ve never made bread before, you might be wondering whether the dough will be too sticky, whether you’ve kneaded it enough, or how you’ll know when it’s ready for the oven.
Those are perfectly reasonable questions. Bread dough changes as you work with it, and learning what to look for is much more useful than memorizing a clock.
For this loaf, remember three things: keep the dough soft, give it enough time to rise, and let the bread cool before slicing.
KITCHEN TOOLS
A Few Helpful Tools for Making Homemade Bread
You don’t need a kitchen full of expensive equipment to make a good loaf of bread. A few familiar tools simply make the process easier, especially when you’re learning.
These are the tools that helped with our loaf, along with why each one is useful.
As an Amazon Associate, I may earn from qualifying purchases and eligible program sign-ups.
Stand Mixer with Dough Hook →
A mixer takes care of the most physical part of bread making: kneading. Instead of working the dough by hand, the hook gradually develops a smooth, elastic dough.
See our stand mixer recommendation below.
Digital Kitchen Scale →
Flour measurements can vary considerably when using cups. Weighing ingredients gives you a more consistent starting point every time.
See our digital kitchen scale recommendation below.
Standard Loaf Pan →
A standard loaf pan gives the dough its familiar sandwich-bread shape. It also earns its place in the kitchen for banana bread and other everyday baking.
See our loaf pan recommendation below.
Instant-Read Thermometer →
Useful for checking the milk temperature before adding yeast and checking the center of the finished loaf.
See our digital thermometer recommendation below.
Wire Cooling Rack →
Allows air to circulate around the finished bread instead of trapping moisture underneath the loaf.
See our cooling rack recommendation below.
A stand mixer can reduce hands-on kneading; use the recommended dough speed. Hand kneading also works.
Affiliate link: We may earn a commission from qualifying purchases at no additional cost to you.
KitchenAid Classic 4.5-quart tilt-head stand mixer, Onyx Black →
An easy, practical choice for sandwich bread, banana bread, and pound cakes. The two-pan set is useful when you want to bake more than one loaf.
Affiliate link: We may earn a commission from qualifying purchases at no additional cost to you.
For consistent homemade sandwich bread, weigh the flour rather than relying only on cups. This Amazon Basics digital scale has a tare function and multiple measuring units.
Affiliate link: We may earn a commission from qualifying purchases at no additional cost to you.
Amazon Basics Digital Kitchen Scale — LCD, tare function, up to 11 lb →

An instant-read digital thermometer helps you check the milk temperature before mixing and the center of your loaf before cooling. This is one available option; you do not need a special bread-only thermometer.
Affiliate link: We may earn a commission from qualifying purchases at no additional cost to you.
Instant-Read Digital Food Thermometer — Backlit Display, Red →
A wire rack lets air reach the bottom of your fresh loaf as it cools. This stainless-steel two-rack set is also useful for cooling cookies and other baked goods.
Affiliate link: We may earn a commission from qualifying purchases at no additional cost to you.
Stainless-Steel Wire Cooling Racks — Two 10 × 15-inch Racks →
For everyday measuring beyond this loaf, a simple set of cups and spoons is handy.
Affiliate link: We may earn a commission from qualifying purchases at no additional cost to you.
If a heavy mixer is difficult to move, an optional sliding tray may help; check fit before ordering.
Affiliate link: We may earn a commission from qualifying purchases at no additional cost to you.
Pine-wood slider tray for KitchenAid 4.5–5-quart tilt-head mixers →
TRY THIS FIRST · USE WHAT YOU HAVE
Don’t buy new equipment just to try this recipe. You can knead by hand, use an ordinary loaf pan, and cool your bread on a clean rack you already own. A scale and thermometer are helpful upgrades, but good bread doesn’t require a shopping spree.
WHY IT WORKS
Simple Ingredients, Beautiful Sandwich Bread
There’s nothing unusual in this recipe, and that’s exactly why it’s so approachable.
All-Purpose Flour
This is the foundation of our loaf. All-purpose flour provides enough structure for an everyday sandwich bread while keeping the crumb tender. No bread flour required.
Any suitable all-purpose flour will work; this is an optional pantry pick.
Affiliate link: We may earn a commission from qualifying purchases at no additional cost to you.
Milk
We used 2% milk, which contributes moisture, flavor, and softness. Whole milk isn’t necessary for this recipe.
Honey
Honey adds a gentle sweetness and encourages a nicely colored crust without turning the loaf into a sweet dessert bread.
Use the honey you already have; this 32-ounce bottle is an option if you need to restock.
Affiliate link: We may earn a commission from qualifying purchases at no additional cost to you.
Egg
One egg adds richness and helps create that tender texture we want in a good sandwich loaf.
Butter–Olive Oil Spread
This is what we used when making our loaf. The added fat helps tenderize the crumb and contributes to a softer eating texture.
Active Dry Yeast
Just one standard 7-gram packet is enough for this recipe. It’s a practical alternative when a sourdough starter isn’t ready or you simply want an uncomplicated loaf.
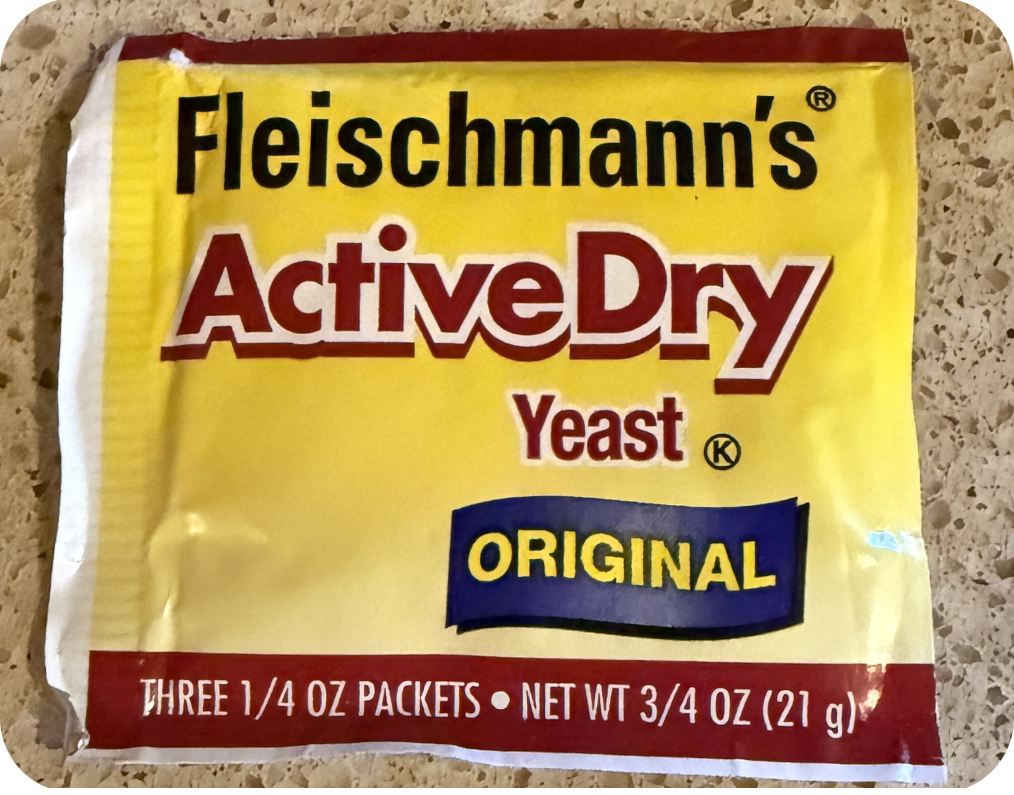
One 7-gram packet goes into the dough; this multipack is for future loaves.
Affiliate link: We may earn a commission from qualifying purchases at no additional cost to you.
Want to understand more about yeast? King Arthur Baking’s guide to baking with yeast is a helpful reference.
Want to dig deeper into bread and other baking techniques? The revised reference book is an option; your library may also have a copy.
Affiliate link: We may earn a commission from qualifying purchases at no additional cost to you.
King Arthur Baking Company’s All-Purpose Baker’s Companion, revised edition →
SAVE · SCALE · PRINT
Here’s the full recipe in one place. Use the serving controls to adjust quantities, check off ingredients as you work, or print a clean copy for your kitchen.
Soft Homemade Sandwich Bread Recipe
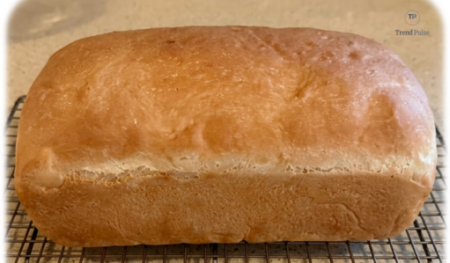
Easy Homemade Sandwich Bread
A soft, golden homemade sandwich loaf made with all-purpose flour, milk, honey, and one packet of active dry yeast. Perfect for sandwiches, toast, and beginners learning to bake bread. Oven Temperature: 350°F
Ingredients
- 420 g all-purpose flourabout 3½ cups
- 240 g 2% milk1 cup
- 7 g active dry yeast1 standard packet
- 35 g honeyabout 1 tablespoon plus 2 teaspoons
- 1 large egg
- 9 g fine salt
- 40 g softened butter–olive oil spread
Instructions
-
Preheat oven to 350°F.
-
Warm milk to 100–110°F. Stir in honey and active dry yeast. Let stand for 5–10 minutes, until bubbles or foam appear.
-
Combine flour, egg, salt, and yeast mixture in a stand mixer fitted with a dough hook. Mix on low for 3 minutes.
-
Gradually add softened butter–olive oil spread. Knead on low-medium (I use setting 3or 4 on my Kitchenaid mixer) for 7–10 minutes until smooth, elastic, and slightly tacky. (Should pass the window pane test.)
-
Place dough in a lightly greased bowl. Cover and let rise until doubled, approximately 60–90 minutes.
-
Gently flatten dough into a rectangle and roll into a snug log. Pinch seam closed. Place seam-side down in a greased 9 × 5-inch loaf pan.
-
Cover and let rise for another 75 minutes, until the dough is approximately 1 inch above the pan rim.
-
Bake for 32–38 minutes, until golden.
-
Check that the center reaches 195–200°F.
-
Remove from pan and cool on a wire
-
rack for at least 90 minutes, preferably
-
2 hours, before slicing.
Notes
Use a kitchen scale for best results.
The dough should be slightly tacky.
Avoid adding excessive flour.
Watch the dough rather than the clock.
Rising times depend on room temperature.
The 240-minute rest time is an estimate that includes both rises and cooling.
Regular softened butter may replace the butter–olive oil spread, although the dough texture may vary slightly.
The loaf can be stored sealed at room temperature for 2–3 days or frozen for up to 2–3 months.
For softer crust, brush the warm loaf lightly with butter.
A slightly larger loaf pan may produce a shorter loaf and change proofing cues.
Do not slice while hot.
The window pane test is a quick tactile check used by bakers to determine if bread dough has been kneaded enough to develop sufficient gluten structure.
To perform the test:
Tear off a small, walnut-sized piece of dough.
Gently and evenly stretch it between your fingers until it forms a thin, translucent membrane.
The result: If the dough stretches without tearing and allows light to pass through like a window pane, the gluten is fully developed and ready to rise. If it tears easily or feels too tight and rubbery, it needs more kneading.
STEP BY STEP
Let’s Make Some Homemade Sandwich Bread
Ready? Gather your ingredients, clear a little counter space, and let’s get started.
We’ll take this one step at a time, including the little things that help beginners feel comfortable working with dough.
Wake Up the Yeast
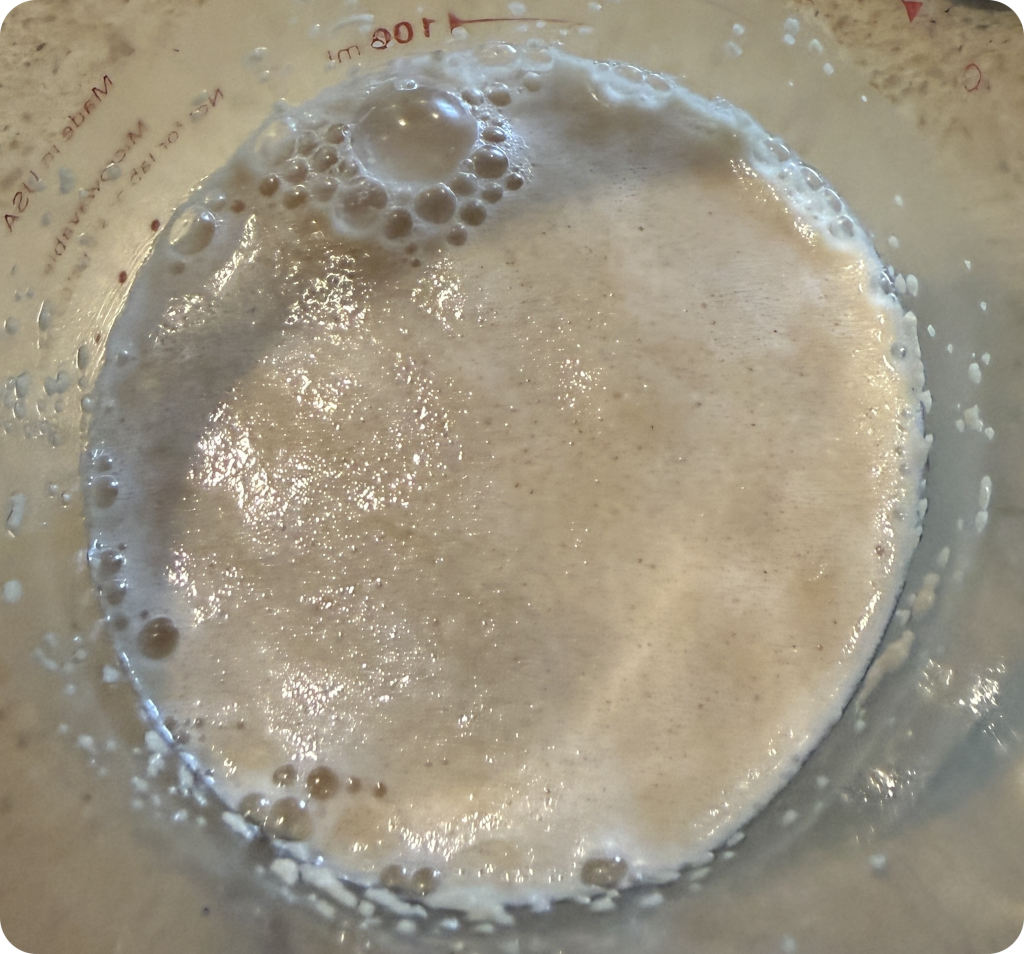
Warm 240 grams (1 cup) of milk to approximately 100–110°F. Stir in 35 grams of honey and one 7-gram packet of active dry yeast. Let the mixture rest for 5–10 minutes, until bubbles or a foamy layer appear on the surface. That’s a reassuring sign that your yeast is active.
Mix the Dough
Add 420 grams of all-purpose flour, one large egg, 9 grams of fine salt, and the yeast mixture to a stand mixer fitted with a dough hook. Mix on low speed for about 3 minutes, until the flour is incorporated. The dough may look shaggy at first. That’s perfectly normal.
Add the Butter and Knead
Gradually add 40 grams of softened butter–olive oil spread. Continue kneading on low to medium-low speed for approximately 7–10 minutes. The dough should become smooth, stretchy, and elastic, pulling mostly away from the sides of the bowl. A slightly tacky feel is what we’re after.
Let the Dough Rise
Transfer the dough to a lightly greased bowl and cover. Place it somewhere comfortably warm until approximately doubled in size, usually 60–90 minutes. The dough should look puffy and feel airy. If your kitchen is cool, give it more time.
Shape the Sandwich Loaf
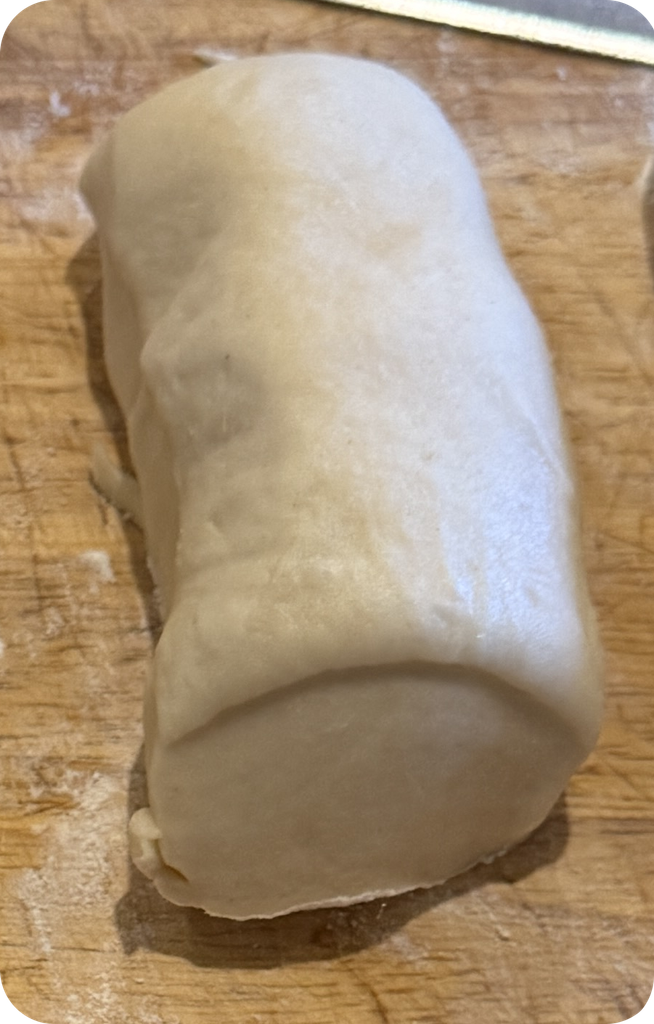
Lightly flour the counter and gently turn out the dough. Flatten it into a rectangle approximately as wide as the length of your loaf pan. Roll it into a snug log, pressing out large air pockets as you go. Pinch the seam closed and place the loaf seam-side down in a lightly greased 9 × 5-inch pan.
Give It One More Rise
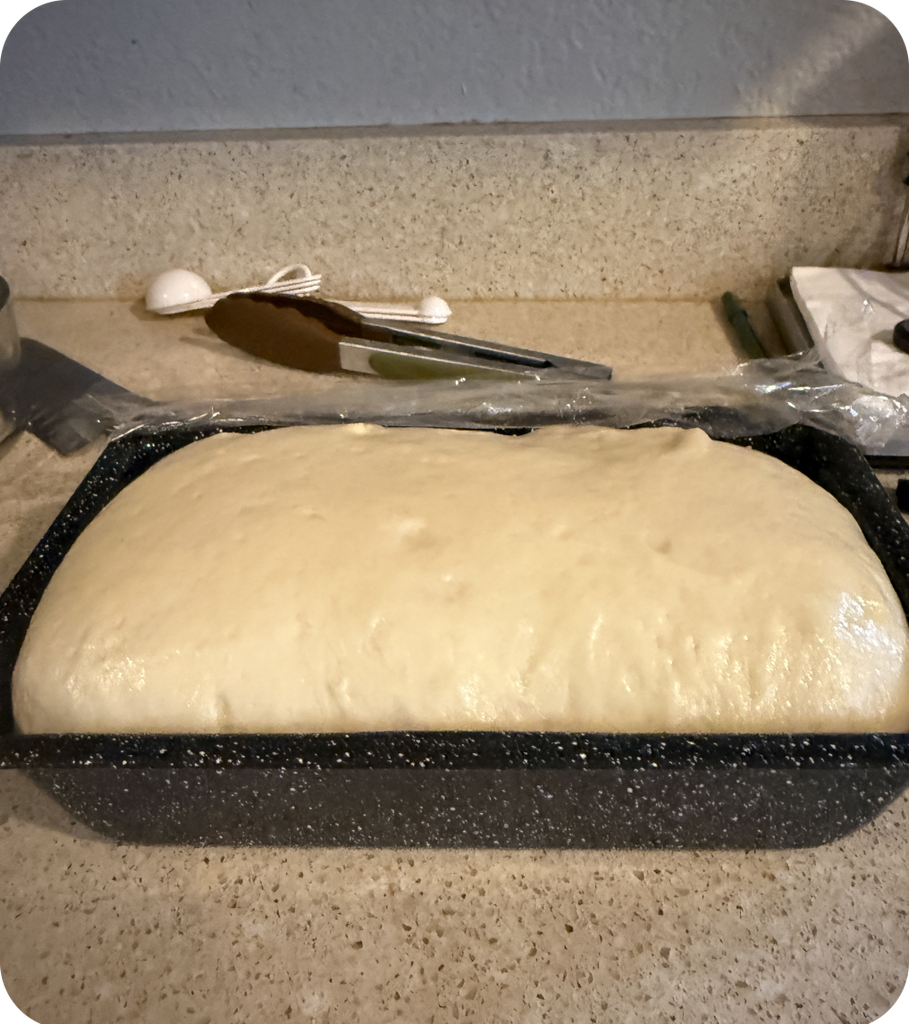
Cover loosely and let the shaped dough rise again, approximately 45–75 minutes. It’s getting close when the center rises roughly 1 inch above the pan rim. Begin preheating your oven to 350°F toward the end of this rise.
Bake Until Golden
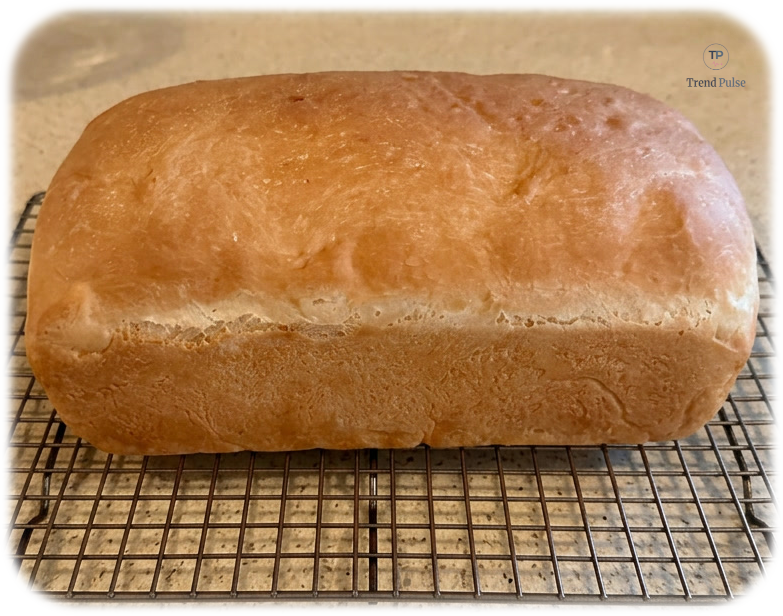
Place the loaf in the preheated 350°F oven. Bake for approximately 32–38 minutes. Avoid opening the oven during the first 25 minutes. The crust should become beautifully golden, and the center should reach approximately 195–200°F when checked with an instant-read thermometer.
Cool, Slice, and Enjoy
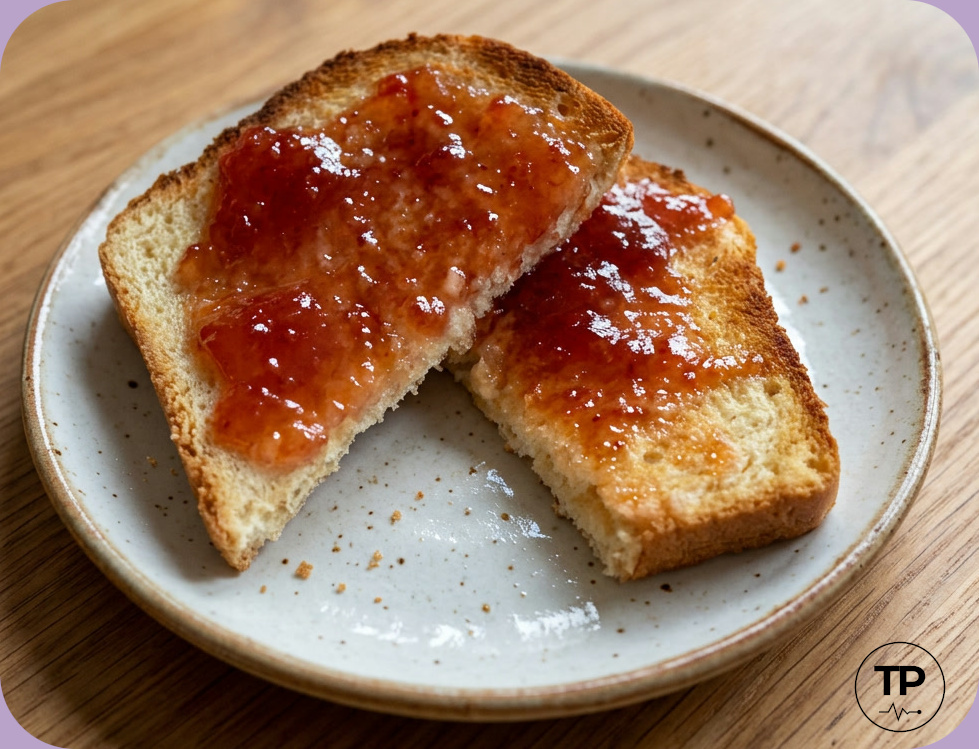
Remove the loaf from the pan promptly and transfer it to a wire cooling rack. For an especially soft crust, lightly brush the warm surface with butter–olive oil spread. Let the bread cool at least 90 minutes, preferably about 2 hours, before slicing.
CHEF’S TIP · DON’T CHASE THE STICKINESS
One of the most common beginner mistakes is adding too much flour because the dough feels sticky. Let the mixer work before deciding whether extra flour is necessary. A soft, slightly tacky dough is one of the secrets to tender sandwich bread.
The dough is ready when it’s ready. Watch what it’s doing, not just what the clock says.
That’s especially important during the second rise. Kitchen temperature, yeast activity, and the way you shape the loaf can all affect how long it takes.
And when the finished loaf comes out of the oven, resist the temptation to slice it immediately. The inside continues setting as it cools, and that patience helps produce cleaner, softer slices.
BREAD-BAKING HELP
Common Homemade Bread Questions
Can I Make Sandwich Bread Without Bread Flour?
Absolutely. This recipe was made with regular all-purpose flour. You don’t need to purchase specialty flour to make a soft, satisfying sandwich loaf.
What If My Bread Dough Feels Sticky?
A little tackiness is normal. Knead thoroughly and give the flour time to absorb the liquid before adding more. Too much extra flour can leave the finished bread heavier and drier than intended.
Why Isn’t My Bread Rising?
Yeast needs time and a suitable temperature. If your kitchen is cool, the dough may simply need longer. Old or inactive yeast can also cause problems, which is why checking the yeast mixture at the beginning is helpful.
Do I Need a Stand Mixer?
No. You can knead bread by hand, although it takes more time and effort. The goal is the same: a smooth, elastic dough that stretches without tearing immediately.
Why Did My Loaf Split Along the Side?
The dough may have needed a little more proofing, or the shaping seam may have opened during baking. A small split usually doesn’t affect the flavor. Consider it a little homemade character.
How Do I Know When Homemade Bread Is Done?
Look for a nicely golden crust, then check the center with an instant-read thermometer. For this recipe, we’re aiming for approximately 195–200°F.
Why Is My Bread Gummy Inside?
The loaf may have been underbaked or sliced before it had enough time to cool. Checking the internal temperature and allowing a proper cooling period can help prevent this.
MAKE IT LAST
How to Store Homemade Sandwich Bread
Homemade bread is wonderful, but it doesn’t have the same preservatives as many commercial loaves. A little attention to storage helps keep it soft and enjoyable.
Room Temperature
Allow the loaf to cool completely before storing. Keep it sealed in a bread bag or airtight container at room temperature for approximately 2–3 days, depending on your kitchen conditions.
Freezing Homemade Bread
For longer storage, slice the loaf first. Wrap it well and freeze in a sealed freezer bag for up to 2–3 months for best quality. You can toast individual slices directly from frozen.
Should You Refrigerate Homemade Bread?
Usually, no. Refrigeration speeds up staling. Room-temperature storage or freezing is generally a better choice, although refrigeration may help prevent mold in unusually hot and humid conditions.
WANT TO KEEP YOUR BREAD FRESH LONGER?
King Arthur Baking has a helpful explanation of bread storage, wrapping, refrigeration, and freezing.
BEYOND THE FIRST SLICE
Five Good Ways to Enjoy Your Homemade Bread
Of course, this bread makes wonderful sandwiches. But there are plenty of ways to enjoy a soft homemade loaf.
- Butter and jam: A thick slice of toast with butter and strawberry jam is hard to beat.
- Grilled cheese: Golden and crisp on the outside, soft and tender in the middle.
- French toast: A lovely use for a slightly older loaf.
- Soup and sandwiches: Homemade bread makes even a simple bowl of soup feel like a complete meal.
- Everyday toast: Sometimes the simplest way to enjoy good bread is the best.
And if you happen to have a little bread left after a few days, slightly stale slices are perfect for French toast.
KEEP COOKING
More from the TrendPulse Kitchen
Looking for another straightforward recipe? Our Easy Baked Chicken: One Dinner, Two Meals uses the same practical approach: familiar ingredients, simple cooking, and making your time in the kitchen count.
Thinking about your everyday kitchen setup? See our guide to bamboo cutting boards and kitchen organizers that actually earn their space.
Or explore more practical cooking ideas in Food & Kitchen →
ONE LOAF WORTH MAKING AGAIN
Sometimes a Change of Plans Turns Out Better Than Expected
What started as a backup plan for a sourdough starter that wasn’t quite ready turned into a recipe we’ll happily make again.
That’s one of the things I love about cooking. Sometimes you follow the plan, and sometimes you discover something even better along the way.
This soft homemade sandwich bread doesn’t require fancy ingredients, expensive equipment, or years of baking experience.
Just a packet of yeast, a few pantry staples, and a little patience.
And when that golden loaf comes out of the oven, there’s something particularly satisfying about knowing you made it yourself.
Especially when the first slice becomes warm toast with butter and jam.
Happy baking!